How to Compile IncrediBots from the Source Code
Tutorial originally created by jayther; images redone and tutorial edited and transferred by EMDFLast Updated: January 24, 2011
Introduction
So you want to compile IncrediBots. Perhaps you want to add a new feature, fix a bug,
or modify the files in some other way. Whatever the reason, this guide will show you how
to compile IncrediBots, with screenshots taken in Windows XP showing how things are done.
I will be using Eclipse (a free IDE) to compile this, so there will be a few differences
from other IDEs (like the need to change one of the files in order to compile, where to
find build options, etc). These steps will show how to compile Incredibots 2. There
almost no difference in the steps to compile Incredibots 1 (you just have to copy the IB1
files instead).
NOTE: You can link to specific steps or sections by clicking
step numbers or headings and copy-pasting the URL in your address bar.
Downloading and Extracting the Files
1.
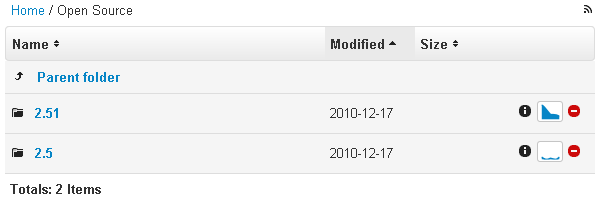
Download the IncrediBots source files from
here,
then extract the zip file to somewhere you can remember. Choose
the latest version! (Currently 2.51)
2.
Download Flex SDK 3.5 from the Adobe website
here,
then extract the zip file to somewhere you can remember. (Choose the Adobe Flex SDK
3.5a under Latest Milestone Builds)

3.
Download the IDE program "Eclipse Classic" from one of the folllowing links (last
download, I promise):
- Windows
- Mac OS X
- Linux

4.
Extract the zip file (.zip) or the tarball (.tar.gz) to where you're going to put the
program files from.
- There's no installation needed. After extracting the zip folder, the executable
"eclipse.exe" ("eclipse" in Linux and OS X) is immediately runnable.
Making a New Project in Eclipse
5.
Run "eclipse.exe" ("eclipse" in Linux and OS X) and wait for it to load. If you start
eclipse for the first time, it asks you to select a workspace. You have to enter a folder
of your choice or accept the standard path. If you wish, you may check the checkbox: "Use
this as a default and do not ask again." so you won't be asked again.
6.
When loaded, click File -> New -> Project...
(NOT Java Project).

7.
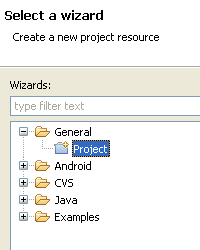
Expand the folder "General" (click the + sign next to the "General" folder) and
choose Project, then click Next.
8.
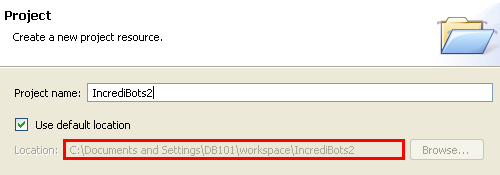
Enter your desired project name in the "Project name" field (this will also be the name
of the folder used to contain your source code files). I will use "IncrediBots2", as
shown in the screenshot below. Take note of the grayed out path in the Location field
(under the Use default location check box, shown in the red box in the screenshot).
That's where you will put Incredibots' files.
9.
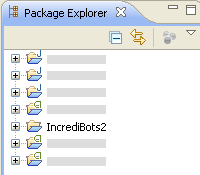
Click Finished (not Next. You can click Next but you don't need to do anything in that
next part). There should be a folder with the project name you specified that appears
in the "Package Explorer" window pane. (to see the folder in the package explorer you
have to close the welcome screen)
10.
Go to the folder where you extracted the open-source files, go to the folder "Incredibots2"
("incredibots" -> "Incredibots Open Source" -> "src" -> "Incredibots2"), and copy all of the
files in "Incredibots2" to the location of the workspace/[project name] (the location you
chose in step 8). If it says that a file already exists and asks you if you want to replace
it, click "Yes" to replace it.

Setting Up Eclipse to Compile
11.
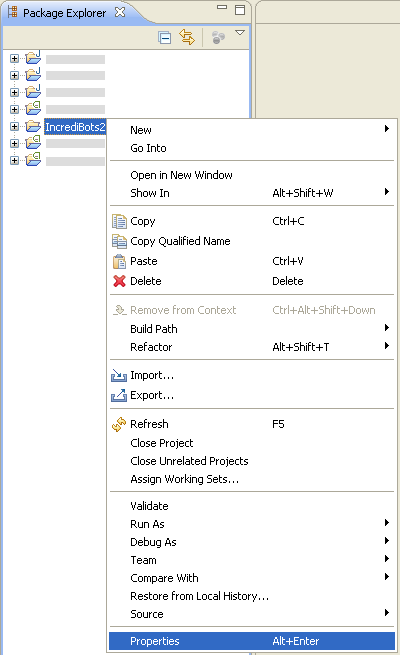
In Eclipse, right-click your project's folder in the Package Explorer pane (control-click
for Mac) and click "Properties".
12.
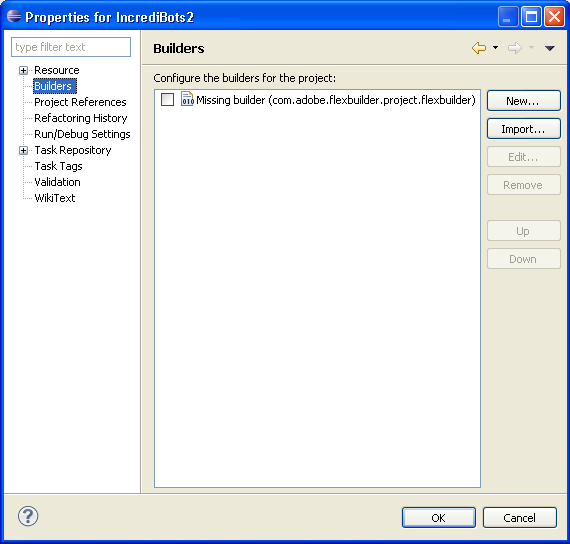
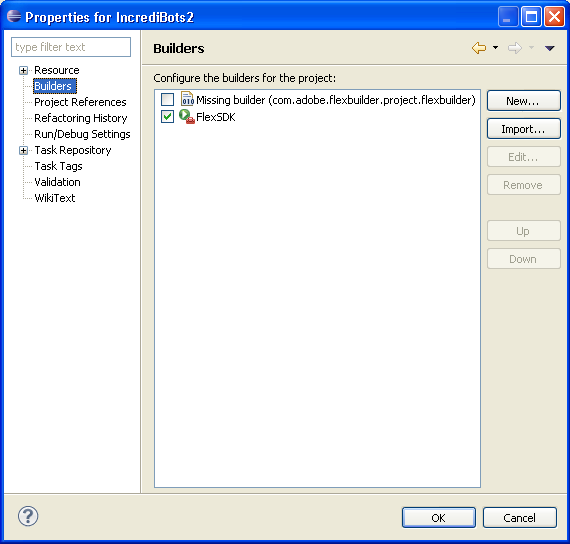
In the "Properties" window in the left pane, click "Builders". If there is a "Missing builder",
uncheck its check box. It will ask you if you're sure about unchecking it; click yes.
13.
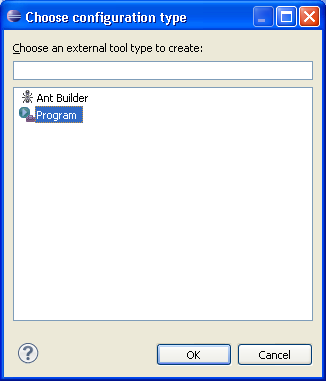
Click "New..." on the right. Choose "Program" and click OK. A window should pop up.
14.
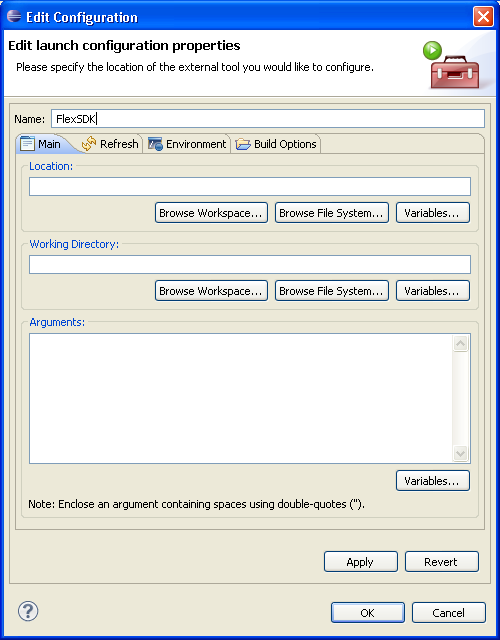
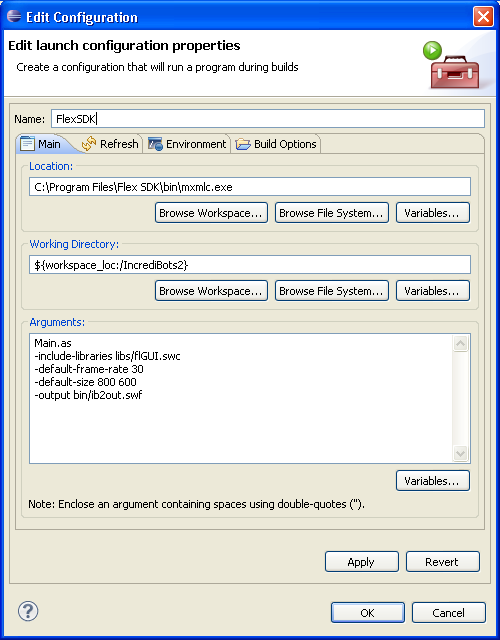
Enter a compiler name on top. You can give it any name you want (I named it "FlexSDK"). Make sure
you're in the "Main" tab of that window.
NOTE: If you move your Flex SDK folder after performing the next
step, the compiler will no longer work, so move the FlexSDK folder to your desired location now.
Editor's note: I recommend your "Program Files" folder so you'll know where it is, instead of for
example "My Documents". For 64-bit users, I recommend your "Program Files (x86)" folder. You may have
to allow it manually if the Vista/7 security dialog pops up.
15.
In the "Location" box, click "Browse File System...", look for the folder where you extracted the Flex
SDK files, go to the "bin" folder, and choose "mxmlc.exe" (or "mxmlc" for Linux and OS X). Click Open.
16.
In the" Working Directory" box, click "Browse Workspace..." and choose your project folder.
17.
Copy and paste this into the "Arguments" box:
											Main.as

											-include-libraries libs/flGUI.swc

											-default-frame-rate 30

											-default-size 800 600

											-output bin/ib2out.swf
It should look something like this by now (for the adding the builder):
18.
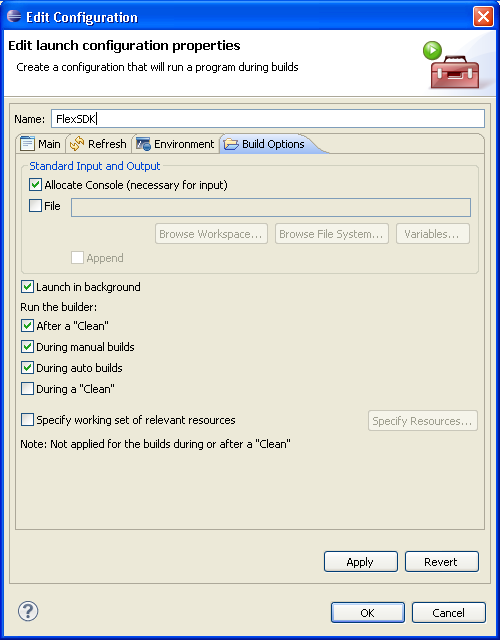
Go to the "Build Options" tab and enable the "Launch in background" and "During auto builds" options.
Then click OK at the bottom. It may or may not try to compile the game. Ignore the console thing
(bottom pane) for now.
19.
Make sure that the builder you just created is checked (enabled) in the Builders area in the Properties
window, then click OK. It may or may not try to compile the game. Ignore it still.
Setting Up the Debugger
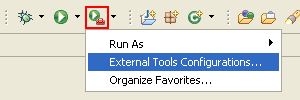
So you can test the game and open it in a Flash 10.1 debuggable wrapper20.
Find 8th icon button thing, click the downwards triangle/arrow next to it, and click "External Tools
Configurations...". A fairly big window should pop up.
21.
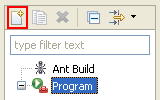
In the list of stuff on the left pane, choose Program and click the New launch configuration icon
(first icon) on top of that list (as shown in pic). The main right pane should change into something
that's similar to the build configuration earlier.
22.
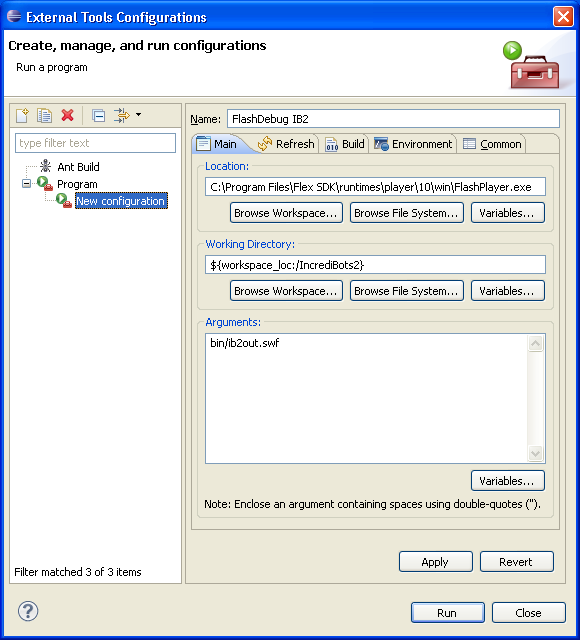
Give the run configuration any name you want, but it should be something self-descriptive. I named it
"FlashDebug IB2".
23.
In the Location box, click "Browse File System..." and go to where you extracted the Flex SDK files,
then go to "runtimes" -> "player" -> "10" -> "win" ("mac" if on OS X, and "lnx" if you're on Linux),
then choose FlashPlayer.exe and click Open.
24.
In the Working Directory box, click "Browse Workspace..." and choose your IB2 folder.
25.
Copy and paste this into the "Arguments" box:
bin/ib2out.swf
It should look something like this so far (if it does, click Apply then click Close):
NOTE: to compile other projects that need a non-default run configuration,
like Android™ apps, right-click their folder in the "Package Explorer" pane and select "Run As" or
"Debug As", then the run configuration needed to run it. For example, to run an Android™ app,
right-click its folder in the "Package Explorer" pane, select "Run As", then "Android App"
Actually Compiling!
This is the part where code requirements might be a little different from other IDEs26.
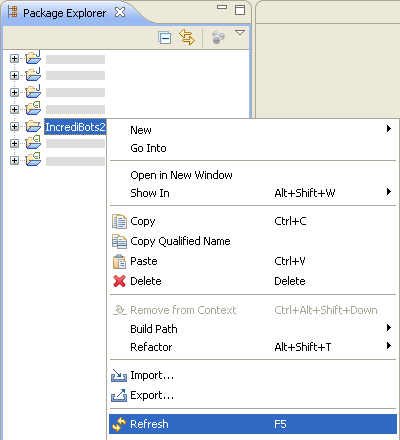
Finally! Time to finally compile (when we want it to)! Right click the project folder in the "Package
Explorer" pane and click "Refresh". The console should say something along the lines of "Loading" or
"Running".
27.
WAIT...It says "Too many errors"! This is normal behavior for Eclipse with our little project (which I spent
almost an hour on how to figure it out and fix it). Click the little plus thing next to your IB2 folder in
the "Package Explorer" pane. A bunch of folders and a couple of files should appear under it.
28.
Click the plus button next to the "Game" folder, then click the plus button of the "Graphics" folder. Look
for a file named "Resource.as".
29.
If you have Flash CS3/CS4/etc. or any other program that opens when you open a ".as" (ActionScript) file, simply
double click that file and the program associated with ".as" files should open and be able to edit it there.
Otherwise, you will have to right-click "Resource.as" in the "Package Explorer" pane, go to "Open with", then click
"Text Editor" and it will open the code on that big middle pane where you can edit it and save (if there's already
a tick on Text Editor, you won't have to do this for all of the files and will just need to double-click it).
30.
You'll see a bunch of lines like this:
											// Mouse cursor resources

											[Embed(source="resource/mouse_pointer.png")] public static var cMouseCursor:Class;

    										[Embed(source="resource/mouse_hourglass.png")] public static var cMouseHourglass:Class;


    										// Main menu resources

    										[Embed(source="resource/incredibots2_logo.png")] public static var cMainMenuLogo:Class;

    										[Embed(source="resource/Incredibots_Congratulations_1.png")] public static var cCongrats:Class;


    										// Level select resources

    										[Embed(source="resource/levelselect_box_1_L.png")] public static var cLevelSelectBox1L:Class;

    										[Embed(source="resource/levelselect_box_1_M.png")] public static var cLevelSelectBox1M:Class;

    										[Embed(source="resource/levelselect_box_1_R.png")] public static var cLevelSelectBox1R:Class;

    										etc...
There should be about 150 of them.
You need to add a forward slash before the word resource in each Embed line, like so:
											[Embed(source="resource/levelselect_box_1_L.png")] public static var cLevelSelectBox1L:Class;

											- to -

											[Embed(source="/resource/levelselect_box_1_L.png")] public static var cLevelSelectBox1L:Class;
Editor's note: For this, I recommend the "Find and Replace" function. Simply copy-paste
[Embed(source="resource/ into the "Find" box, and [Embed(source="/resource/ into
the "Replace With" box. Then, click "Find" to find the first one, "Replace" to replace just the one, then
"Replace All" if the first replace worked correctly. Otherwise, you could spend 10+ minutes on this step.
31.
When you save the file, refresh the project folder again (right-click on the project folder, click Refresh)
to compile it.

32.
It should compile successfully! The console should say "Loading configuration file: (path to xml file)" while
it's compiling, and then a path of the resulting .swf file, then the size of the file in number of bytes.
33.
Then click the play button with the little toolbox/bag looking thing but this time, the actual icon, not
the little triangle/arrow (8th icon in the toolbar thing on top, the same one as when we configured the
debugger). It should pop up and play your compiled game! (Also, with the debugger thing, any runtime
error that happens will pop up an error window letting you know what happened and which function(s) it
happened in)
34.
To run the SWF in a browser environment, make sure to change the name of the file and/or the SWF names in
the incredibots.html or incredibots2.html files. If you're going to replace incredibots.swf or
incredibots2.swf, make sure to append "?#", where "#" is a random number, at the end of all SWF references
in the HTML files, because the browser always caches the SWF file and will always load the cached SWF file
until you clear your cache or you make it think it's a different flash file. Adding "?#" to the end makes
it think it's a different flash file, as long as you continue to use different numbers as you go along
(consecutive numbers may be best, such as "?1", then "?2", then "?3", then "?4", etc.). After the first time
you do this, replace the number with a new one instead of adding another
instance of "?#".

